Introduction
This is one of my many hobby projects done this semester. It is aimed to learning how to use Hardwares for AR/VR. I wanted to experiment with the Leap Motion Controller as soon as I knew about it.
Softwares and Hardwares
- Leap Motion Controller
- Unity Software
- Leap Motion Core Assest and Leap Motion Setup
Third point is very easy and the installation takes hardly a minute.
Description
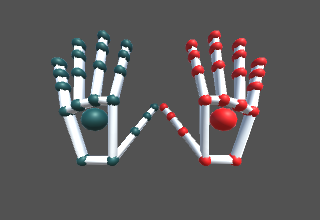
Leap Motion is very easy to use and the tracking is smooth. I downloaded the Leap Motion Core Asset and imported the Rigged Hand Model in Unity and the basic tracking is done!! As simple as that.
Now for using the tracked hand as a keyboard, we need to keep in mind the following important points:
- How a key press would work and where are the keys placed?
- How does the same reflects in the code?
Keyboard Design - I
All the existing keyboard has this issue that there is no feedback, i.e. the user does not feel the button press. Hence I thought of fixing the keys on the finger and using the thumb to press them, just as we use our fingers to count of to 12 - three in each of the four fingers.
Method
I used “Attachement Rig” model in Unity and attached it to the existing Hand Model in the Unity. This model has all the different part of the finger available as separate GameObject. Once I have done this, it is now easy to find the distance between two GameObject, which in turn would be representation of the real hand position. With proper thresholding, we can have a good reaction and the key press was printed on the screen.
Problems with this Keyboard design
The major issue in this was the tracking of the fingers. Leap Motion sufferes from errors due to finger getting occluded. And in this design, we are forcing the thumb to come in front to other fingers while typing. Hence this is prone to error and hence the results were erreneous.
Keyboard Design - II
This design has very sparse keys and hence very less chance of error. In this scheme of keyboards, the letters are spread over three layers with a maximum of ten letters in one layer (since we have ten fingers into use). Now each finger represents one letter. Move the finger forward and the corresponding finger is marker as pressed. To move to the next layer, give a jerk and it will go to the next layer. Another jerk would take us to the third layer. This works nicely and is very suitable for use as a keyboard.
Conclusion
It was very fun working with this Leap Motion Controller. It is very easy to use and suitable for VR/AR purpose. My first experiment with a hardware device for VR was successful and I enjoyed working on this. However, I realized that GPU on my system is slow for this kind of task and hence I suffered some accuracy issues.

